Quick Pi-hole Setup
Intro
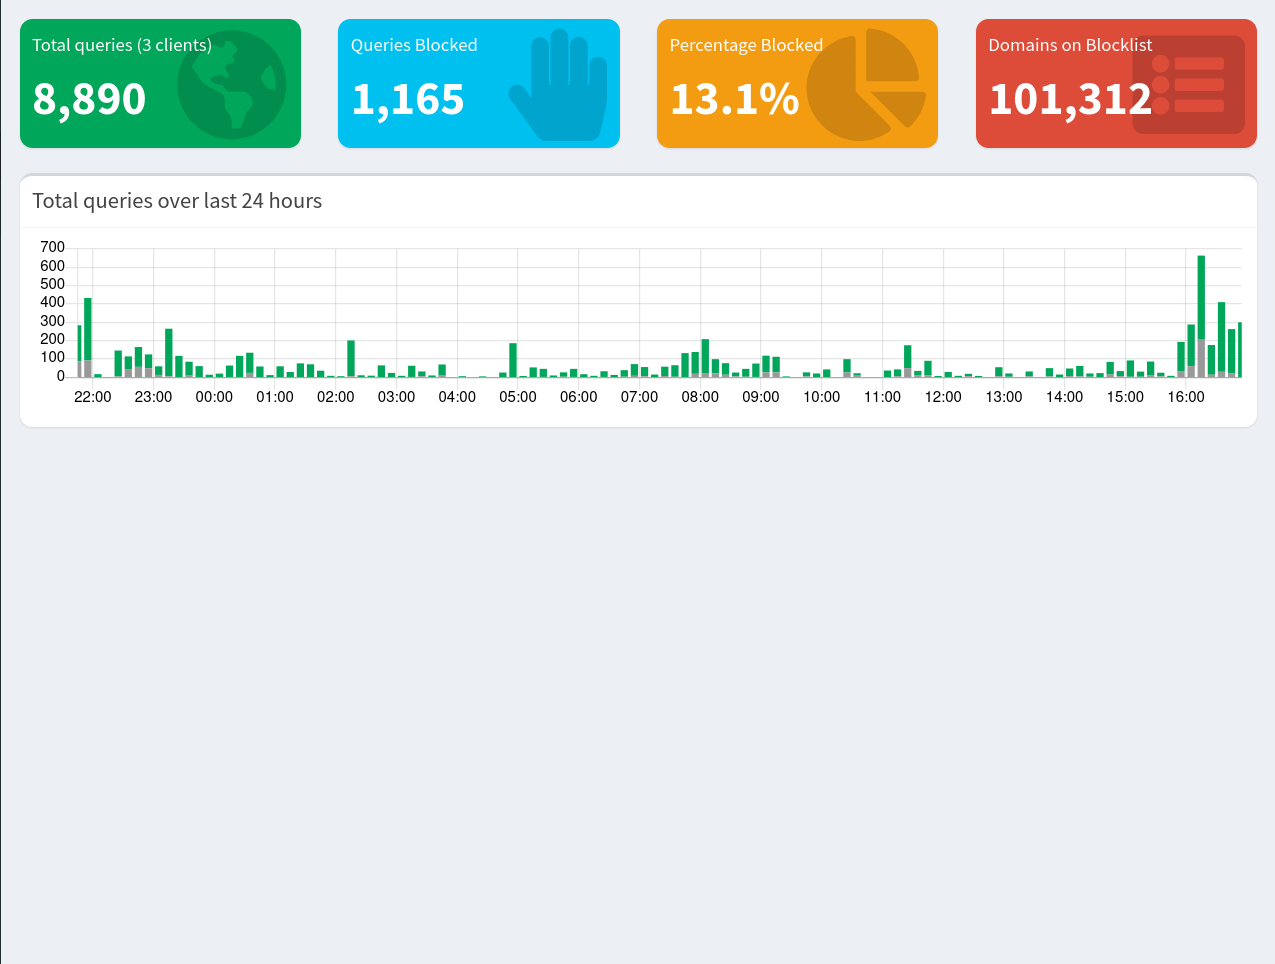
Last night I installed pi-hole on one of my raspberry pies and am quite pleased with the results. I spent several days reading a about pi-hole and figured it would be complicated to get configured. In all it took about 10 minutes to get up and running and I wish I would have done it sooner.
Installation
Setup Static IP Address
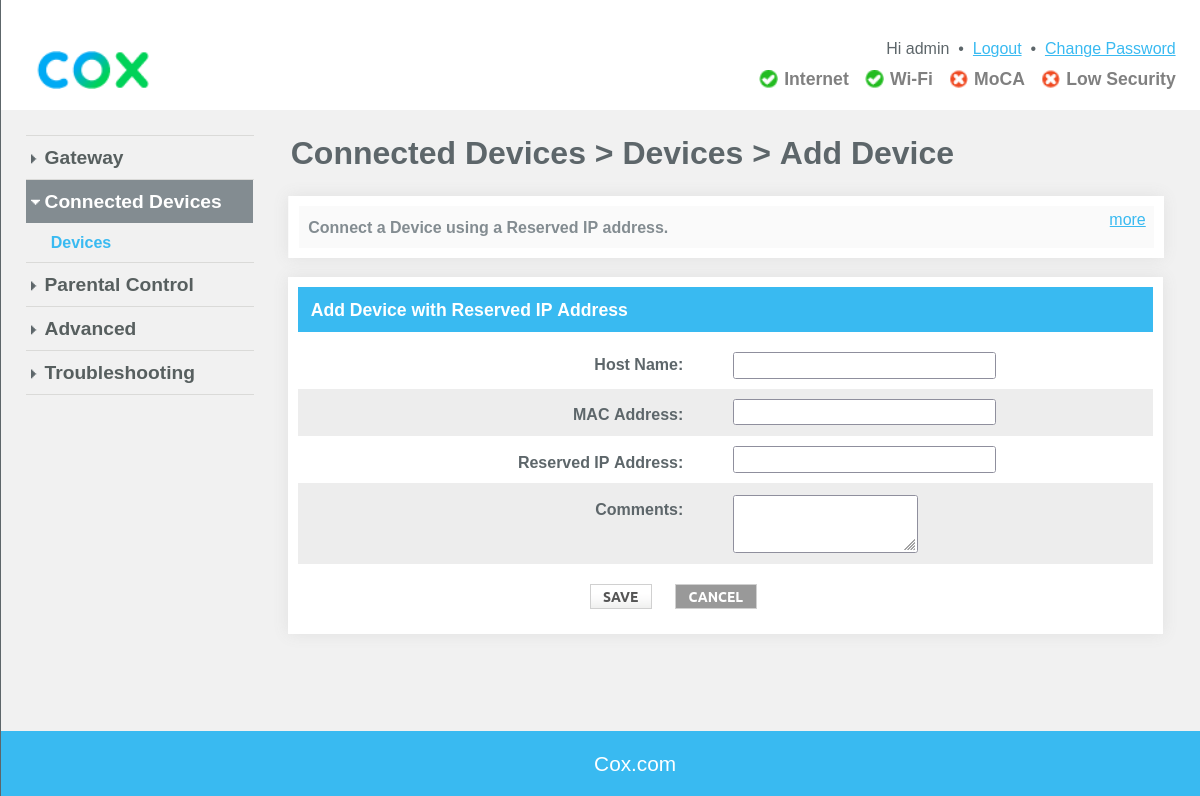
First you need to set up a static IP address for the pi to make thing easier. The easiest way to do this in my case was to simply login to the router and change the settings there. On my router settings there was a button called “Add device with reserved IP” which takes you to a simple form.
Supported OS
I would have run pi-hole directly on my device, but unfortunately I am running the Manjaro Arm edition on all of my pies. At the time of writing, the operating systems show below support pi-hole.
| Distribution | Release | Architecture |
|---|---|---|
| Raspberry Pi OS (formerly Raspbian) | Stretch / Buster / Bullseye | ARM |
| Ubuntu | 16.x / 18.x / 20.x /21.x | ARM / x86_64 |
| Debian | 9 / 10 /11 | ARM / x86_64 / i386 |
| Fedora | 33 / 34 | ARM / x86_64 |
| CentOS | 7 / 8 | x86_64 |
Fortunately, this problem is solved with Docker.
Docker
The very first link from pi-hole’s documentation points to how to run the software in a docker container. Even though I could now theoretically run pi-hole from any Linux distro/machine, I chose to continue on the raspberry pi 4 as there is a low energy cost with keeping it running all the time.
I followed the quick start guide on GitHub which is well documented. You can have pi-hole up and running by simply following the next steps!
Steps
sudo pacman -Syu docker docker-compose- Paste the following code into a file named
docker-compose.yml
version: "3"

# More info at https://github.com/pi-hole/docker-pi-hole/ and https://docs.pi-hole.net/
services:
  pihole:
    container_name: pihole
    image: pihole/pihole:latest
    ports:
      - "53:53/tcp"
      - "53:53/udp"
      - "67:67/udp" # Only required if you are using Pi-hole as your DHCP server
      - "80:80/tcp"
    environment:
      TZ: 'America/Chicago'
      # WEBPASSWORD: 'set a secure password here or it will be random'
    # Volumes store your data between container upgrades
    volumes:
      - './etc-pihole:/etc/pihole'
      - './etc-dnsmasq.d:/etc/dnsmasq.d'
    #   https://github.com/pi-hole/docker-pi-hole#note-on-capabilities
    cap_add:
      - NET_ADMIN # Recommended but not required (DHCP needs NET_ADMIN)
restart: unless-stopped- Change the
WEBPASSWORDand other settings as necessary - Run
docker-compose up -dto build and start pi-hole - Go to the IP address of your pi in your browser
(e.g.
192.168.0.foo/admin) to get to the pi hole web UI. - Setup your devices with the DNS of your pi.
Setup DNS on each device
For the time being, I decided that I wanted to manually configure each device to use pi-hole rather than configuring my entire network through the router’s settings. The main reason being that if the pi goes down for some reason, I can still connect to the internet by simply reverting the devices settings rather than messing with the router.
iPhone
- Go to Settings
- Wi-Fi
- Click the i symbol with circle next to your network
- Configure DNS
- Change from automatic to manual
- Delete any DNS servers that may be there already
- Enter the IP address of you pi
Desktop Linux
I initially tried changing the DNS settings using Network Manager through a GUI called “Advanced Network Configuration” but the settings did not appear to do anything.
What worked for me was to create the file
/etc/NetworkManager/conf.d/dns-servers.conf which
contains
[global-dns-domain-*]
servers=::1,192.168.0.29
where 192.168.0.29 is the static IP address of my pi. More
information about this file can be found at the NetworkManager
page on the arch wiki.